Version 1: Texture Atlas
Animated graphics and image sequences can be created using a PlaneSequenceGeometry node. For this purpose, we need a texture atlas and an Atlas XML file:
texture_explosion.pngatlas_explosion.xml
The texture atlas unifies many single images to one large image with the Atlas XML file storing the position of all single images. Both files have to be specified in the file package.xml.
    <!-- Graphic resources -->
    <Resource id="gfx_explosion" fileName="gfx/gfx_explosion.png"/>

    <!-- Atlas resources -->
    <Resource id="atlas_explosion"   fileName="atlas_explosion.xml"/>
The texture atlas shows an animated explosion consisting of 32 single images. Every single image has a size of 64x64 pixels, but it is also possible to compose an atlas of images each having different dimensions.
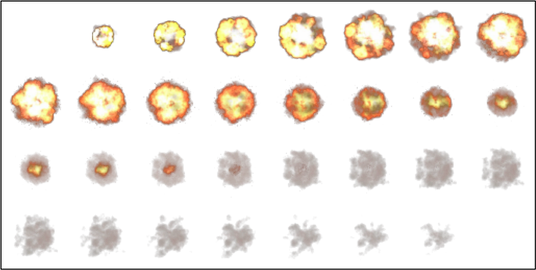
In the Atlas XML file a rectangular section is defined for every single image in the atlas texture. By using the attributes texCoordX1 and texCoordX2 the X-coordinates and by using texCoordY1 and texCoordY2 the Y-coordinates are defined, respectively. All of these values are relative to the PlaneSequenceGeometry's textureSizeX and textureSizeY attributes specified later.
For our example we use the pixel coordinates and specify the pixel resolution of the total image for textureSizeX and textureSizeY. Alternatively, the use of normalized values between 0 and 1 for the coordinates and the default value 1 for textureSizeX and texturesizeY is quite common.
<?xml version="1.0" ?>

<Atlas>

    <Rectangle texCoordX1="0"   texCoordY1="0" texCoordX2="64"  texCoordY2="64"/>
    <Rectangle texCoordX1="64"  texCoordY1="0" texCoordX2="128" texCoordY2="64"/>
    <Rectangle texCoordX1="128" texCoordY1="0" texCoordX2="192" texCoordY2="64"/>
    <Rectangle texCoordX1="192" texCoordY1="0" texCoordX2="256" texCoordY2="64"/>
    <Rectangle texCoordX1="256" texCoordY1="0" texCoordX2="320" texCoordY2="64"/>
    <Rectangle texCoordX1="320" texCoordY1="0" texCoordX2="384" texCoordY2="64"/>
    <Rectangle texCoordX1="384" texCoordY1="0" texCoordX2="448" texCoordY2="64"/>
    <Rectangle texCoordX1="448" texCoordY1="0" texCoordX2="512" texCoordY2="64"/>

    <Rectangle texCoordX1="0"   texCoordY1="64" texCoordX2="64"  texCoordY2="128"/>
    <Rectangle texCoordX1="64"  texCoordY1="64" texCoordX2="128" texCoordY2="128"/>
    <Rectangle texCoordX1="128" texCoordY1="64" texCoordX2="192" texCoordY2="128"/>
    <Rectangle texCoordX1="192" texCoordY1="64" texCoordX2="256" texCoordY2="128"/>
    <Rectangle texCoordX1="256" texCoordY1="64" texCoordX2="320" texCoordY2="128"/>
    <Rectangle texCoordX1="320" texCoordY1="64" texCoordX2="384" texCoordY2="128"/>
    <Rectangle texCoordX1="384" texCoordY1="64" texCoordX2="448" texCoordY2="128"/>
    <Rectangle texCoordX1="448" texCoordY1="64" texCoordX2="512" texCoordY2="128"/>

    <Rectangle texCoordX1="0"   texCoordY1="128" texCoordX2="64"  texCoordY2="192"/>
    <Rectangle texCoordX1="64"  texCoordY1="128" texCoordX2="128" texCoordY2="192"/>
    <Rectangle texCoordX1="128" texCoordY1="128" texCoordX2="192" texCoordY2="192"/>
    <Rectangle texCoordX1="192" texCoordY1="128" texCoordX2="256" texCoordY2="192"/>
    <Rectangle texCoordX1="256" texCoordY1="128" texCoordX2="320" texCoordY2="192"/>
    <Rectangle texCoordX1="320" texCoordY1="128" texCoordX2="384" texCoordY2="192"/>
    <Rectangle texCoordX1="384" texCoordY1="128" texCoordX2="448" texCoordY2="192"/>
    <Rectangle texCoordX1="448" texCoordY1="128" texCoordX2="512" texCoordY2="192"/>

    <Rectangle texCoordX1="0"   texCoordY1="192" texCoordX2="64"  texCoordY2="256"/>
    <Rectangle texCoordX1="64"  texCoordY1="192" texCoordX2="128" texCoordY2="256"/>
    <Rectangle texCoordX1="128" texCoordY1="192" texCoordX2="192" texCoordY2="256"/>
    <Rectangle texCoordX1="192" texCoordY1="192" texCoordX2="256" texCoordY2="256"/>
    <Rectangle texCoordX1="256" texCoordY1="192" texCoordX2="320" texCoordY2="256"/>
    <Rectangle texCoordX1="320" texCoordY1="192" texCoordX2="384" texCoordY2="256"/>
    <Rectangle texCoordX1="384" texCoordY1="192" texCoordX2="448" texCoordY2="256"/>
    <Rectangle texCoordX1="448" texCoordY1="192" texCoordX2="512" texCoordY2="256"/>

</Atlas>
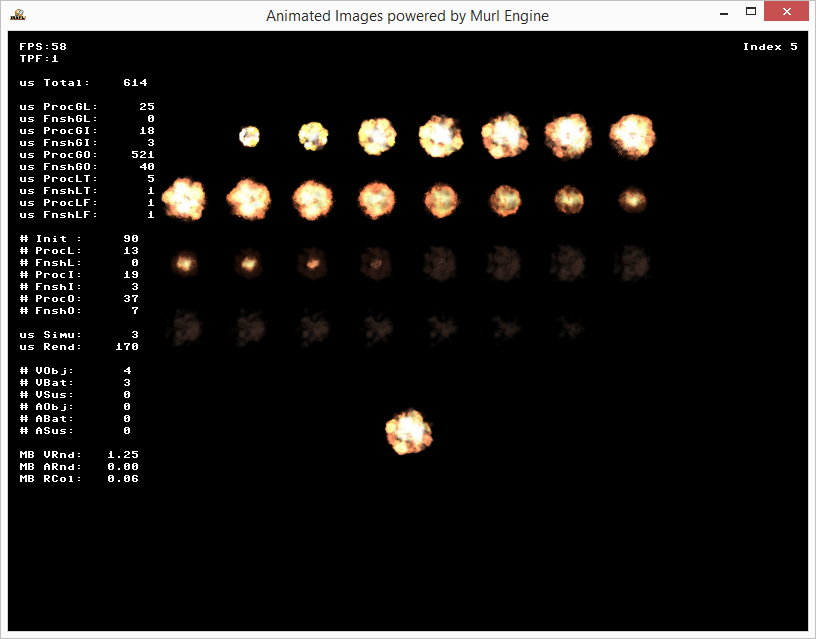
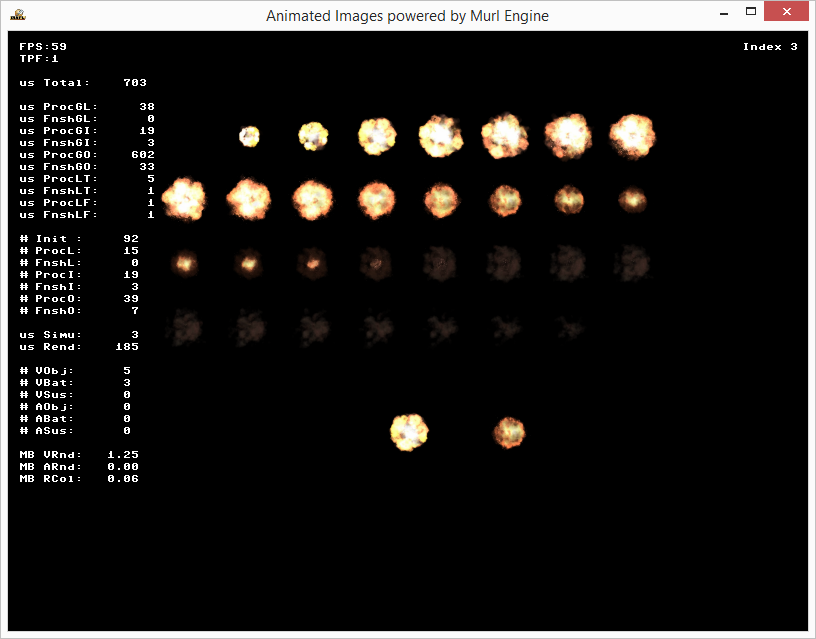
Plane Sequence Geometry
In the graph we now activate the atlas texture with TextureState and select a suitable material for drawing.
Afterwards, we define a PlaneSequenceGeometry in order to display the single images. For comparison we also create a PlaneGeometry node which shows the whole texture atlas.
The attribute atlasResourceId specifies the Atlas XML file which has to be used, containing the positions for all single images. With textureSizeX and textureSizeY we then specify the size of the whole texture atlas image in relation to the coordinate values stated in the Atlas XML file.
Every rectangle in the Atlas XML file defines a single image with a unique index. The indexation starts at 0 and continues in ascending order. The attribute index selects the desired sub-image.
    <TextureState textureId="material/texture_explosion"/>
    <MaterialState materialId="material/mat_alpha_color_texture"/>

    <PlaneGeometry
        id="plane5"
        scaleFactorX="512" scaleFactorY="256"
        posX="0" posY="100"
    />

    <PlaneSequenceGeometry
        id="myPlaneSequence"
        atlasResourceId="package_main:atlas_explosion"
        textureSizeX="512" textureSizeY="256"
        scaleFactorX="64" scaleFactorY="64"
        index="5"
        posX="0" posY="-100"
    />
In order to change the index number in our logic program, we create a PlaneSequenceGeometryNode object:
Logic::PlaneSequenceGeometryNode mPlaneSequence;
and link it to the graph node:
AddGraphNode(mPlaneSequence.GetReference(root, "myPlaneSequence"));
By using the SetIndex() method it is possible to select one of the a sub-images. For control we use the right and left mouse button as well as the right and left arrow key.
void App::AnimatedImagesLogic::OnProcessTick(const Logic::IState* state)
{
    Logic::IDeviceHandler* deviceHandler = state->GetDeviceHandler();

    if (deviceHandler->WasMouseButtonPressed(IEnums::MOUSE_BUTTON_LEFT) ||
        deviceHandler->WasRawKeyPressed(RAWKEY_RIGHT_ARROW))
    {
        UInt32 index = mPlaneSequence->GetIndex() + 1;
        index = index < 32 ? index : 0;
        mPlaneSequence->SetIndex(index);
        state->SetUserDebugMessage("Index " + Util::UInt32ToString(index));
    }

    if (deviceHandler->WasMouseButtonPressed(IEnums::MOUSE_BUTTON_RIGHT)||
        deviceHandler->WasRawKeyPressed(RAWKEY_LEFT_ARROW))
    {
        UInt32 index = mPlaneSequence->GetIndex() - 1;
        index = index > 31 ? 31 : index;
        mPlaneSequence->SetIndex(index);
        state->SetUserDebugMessage("Index " + Util::UInt32ToString(index));
    }

    if (deviceHandler->WasRawKeyPressed(RAWKEY_ESCAPE) ||
        deviceHandler->WasRawButtonPressed(RAWBUTTON_BACK))
    {
        deviceHandler->TerminateApp();
    }
}
Version 2: Animation
Instead of selecting one single image with SetIndex(), it is also possible to automatize the animation with another animation file and to play it time-controlled.
Again, the new file has to be specified with a unique id in the package.
    <!-- Animation resources -->
    <Resource id="anim_explosion"    fileName="anim_explosion.xml"/>
Within the animation file we create an animation with a defined start time (0.0 seconds) and end time (1.5 seconds). By using the element IndexKey we create a sequence of index values with their corresponding time values. In our example we only use two basic values: one at 0.0 seconds with an index value of 0 and one at 1.5 seconds with an index value of 31. The intermediate values are automatically calculated according to a predetermined interpolation formula.
<?xml version="1.0" ?>

<Animation startTime="0.0" endTime="1.5">

    <IndexKey time="0.0" value="0"/>
    <IndexKey time="1.5" value="31"/>

</Animation>
We create a new PlaneSequenceGeometry node and link it to the animation file by using the attribute controller.animationResourceId. Additionally, we pack this node into a Graph::Timeline node in order to control the animation.
    <Timeline
        id="explosion_timeline"
        startTime="0.0" endTime="1.5" autoRewind="yes"
    >
        <PlaneSequenceGeometry
            id="myAnimationPlaneSequence"
            atlasResourceId="package_main:atlas_explosion"
            textureSizeX="512" textureSizeY="256"
            scaleFactorX="64" scaleFactorY="64"
            posX="100" posY="-100"
            controller.animationResourceId="package_main:anim_explosion"
        />
    </Timeline>
In the method OnProcessTick(), we control the animation using a suitable Logic::TimelineNode. The animation can now be restarted with the left mouse button and paused with the right mouse button.
void App::AnimatedImagesLogic::OnProcessTick(const Logic::IState* state)
{
    Logic::IDeviceHandler* deviceHandler = state->GetDeviceHandler();

    if (deviceHandler->WasMouseButtonPressed(IEnums::MOUSE_BUTTON_LEFT) ||
        deviceHandler->WasRawKeyPressed(RAWKEY_RIGHT_ARROW))
    {
        UInt32 index = mPlaneSequence->GetIndex() + 1;
        index = index < 32 ? index : 0;
        mPlaneSequence->SetIndex(index);
        state->SetUserDebugMessage("Index " + Util::UInt32ToString(index));
        mTimeLine->Rewind();
        mTimeLine->Start();
    }

    if (deviceHandler->WasMouseButtonPressed(IEnums::MOUSE_BUTTON_RIGHT)||
        deviceHandler->WasRawKeyPressed(RAWKEY_LEFT_ARROW))
    {
        UInt32 index = mPlaneSequence->GetIndex() - 1;
        index = index > 31 ? 31 : index;
        mPlaneSequence->SetIndex(index);
        state->SetUserDebugMessage("Index " + Util::UInt32ToString(index));
        if (mTimeLine->IsPaused())
            mTimeLine->Start();
        else
            mTimeLine->Pause();
    }

    if (deviceHandler->WasRawKeyPressed(RAWKEY_ESCAPE) ||
        deviceHandler->WasRawButtonPressed(RAWBUTTON_BACK))
    {
        deviceHandler->TerminateApp();
    }
}
Version 3: Interpolation
An animation file can not only control the IndexKey, but also many other parameters. For example, an image can be shown or hidden with the AlphaKey or moved with the PositionKey. The following key elements are available:
VisibleKeyActiveKeyIndexKeyAlphaKeyVolumeKeyTimeKeyAmbientColorKeyDiffuseColorKeySpecularColorKeyEmissiveColorKeyPositionKeyScalingKeyAxisAngleKeyQuaternionKey
See also section Animation Resources in the User's Guide documentation for details.
The attribute interpolation allows defining the interpolation function for every key element (default value: LINEAR). All valid values are listed in the enumeration IEnums::Interpolation.
Interpolation functions
In the following example the visibility and the index are controlled through the animation.
<?xml version="1.0" ?>
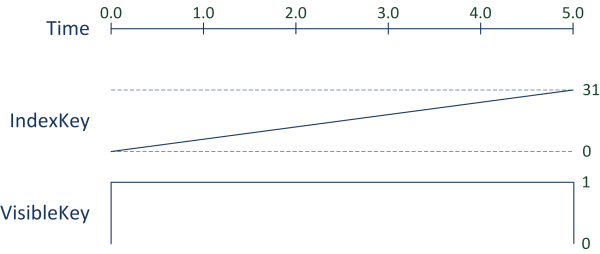
<Animation startTime="0.0" endTime="5">
<VisibleKey time="0.0" value="0" interpolation="CONSTANT"/>
<VisibleKey time="0.01" value="1" interpolation="CONSTANT"/>
<VisibleKey time="5" value="0"/>
<IndexKey time="0.0" value="0" interpolation="LINEAR"/>
<IndexKey time="5" value="31"/>
</Animation>
When the animation is started, the VisibleKey is set to visible (1) at 0.01 seconds. As soon as the animation is finished, the VisibleKey is set to invisible (0) at 5 seconds.
Additionally, with the attribute controller.timeScale and controller.timeShift, it is possible to scale and move the time specification in the animation file. The time in the animation file is calculated by using the formula:
(time – animationTimeShift) * animationTimeScale
In the following example the animation is played twice as fast because of the specification controller.timeScale="2" (i.e. within 2.5 seconds instead of 5 seconds as defined in the animation file).
    <Timeline
        id="explosion_timeline"
        startTime="0.0" endTime="3" autoRewind="yes"
    >

        <PlaneSequenceGeometry
            id="myAnimationPlaneSequence"
            atlasResourceId="package_main:atlas_explosion"
            textureSizeX="512" textureSizeY="256"
            scaleFactorX="64" scaleFactorY="64"
            posX="300" posY="-100"
            controller.animationResourceId="package_main:anim_explosion"
            controller.timeScale="2"
        />
In order to compare some different interpolation functions, we create a PlaneGeometry node with its own animation file for each interpolation function.
<?xml version="1.0" ?>

<Animation startTime="0.0" endTime="1">

  <PositionKey time="0.0" posX="-50" posY="-250" interpolation="SMOOTHSTEP_IN"/>
  <PositionKey time="1"   posX="-50" posY="250"/>

</Animation>
        <PlaneGeometry
            id="plane6"
            scaleFactorX="64" scaleFactorY="64"
            controller.animationResourceId="package_main:anim_smoothstep_in"
            depthOrder="1"
        />
        <PlaneGeometry
            id="plane7"
            scaleFactorX="64" scaleFactorY="64"
            controller.animationResourceId="package_main:anim_smoothstep_out"
            depthOrder="1"
        />
        <PlaneGeometry
            id="plane8"
            scaleFactorX="64" scaleFactorY="64"
            controller.animationResourceId="package_main:anim_smoothstep_in_out"
            depthOrder="1"
        />
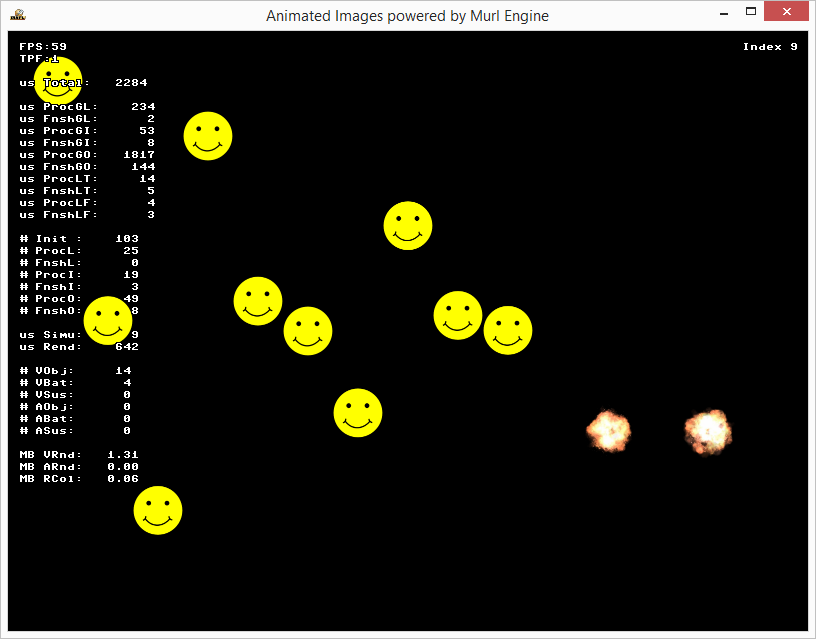
As a result, we receive several smiley images, which move from bottom to top with different velocity characteristics when pressing the left mouse button.