To be able to load a 3D model with the Murl Engine, it must first be converted into a Resource::Mesh. The Murl Engine provides the two tools Scene Converter and Scene Viewer for this purpose. Usually the following steps are necessary, to be able to use a 3D model in an app:
- Export the 3D model from your 3D modelling software.
- Analyze the 3D model.
- Convert the 3D model.
- Instantiate the converted 3D model.
Quick links to the individual sections in this tutorial:
- Export
- Analyze
- Configuration File
- Load Package and Display 3D Model
- Custom Material
- Multiple Instances
- Messerschmitt Bf 110
- Darius
- Pony
- Useful Configuration Parameters
Export
3D models can be created in any 3D modeling software (e.g. Blender, Cinema 4d, 3ds Max, zBrush etc.). The model then needs to be exported in a proper file format for the Scene Converter.
The Scene Converter uses Assimp (Open Asset Import Library) and the Autodesk FBX SDK to read 3D model files and therefore supports many different file formats. A list with all supported Assimp file formats can be found here.
We recommend to use the FBX file format because it provides good flexibility and usually causes less trouble.
Analyze
We use some free 3D models from the website sketchfab.com for this tutorial.
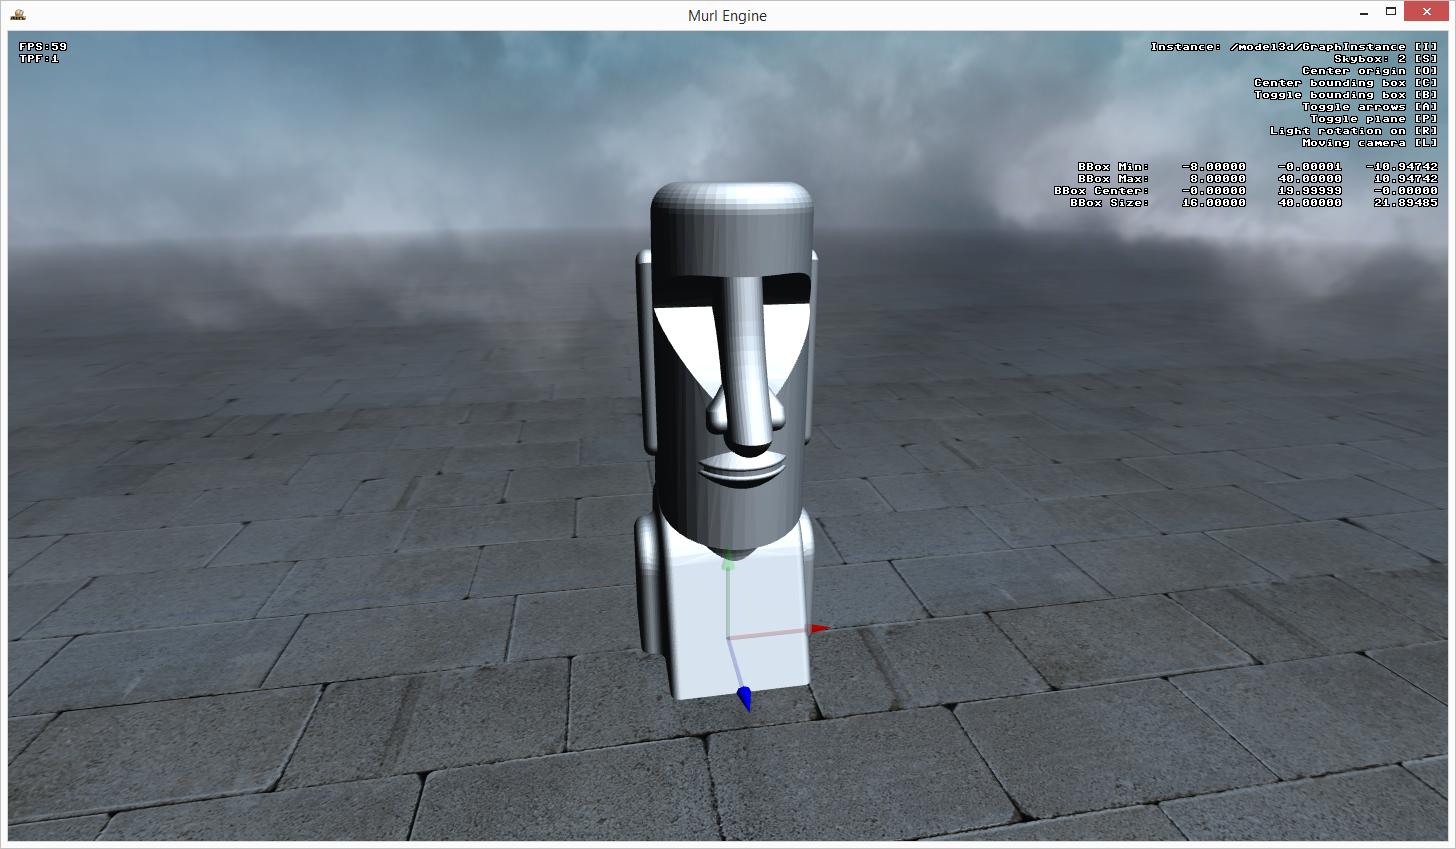
The first model is named Easter Island Head, has been created by Microsoft and is licensed under the Creative Commons Attribution license. We store the file easter-island-head.stl in the folder data/orig/easter-island-head.
The Scene Converter tool with the parameter -z can be used to analyze the file.
The tool generates the following output:
Murl Scene Converter V1.00.5467 beta, Copyright 2010-2015 Spraylight GmbH
Scene Converter: Analyzing scene from file 'easter-island-head\easter-island-head.stl'
Scene Converter: Loading scene file 'easter-island-head\easter-island-head.stl'.
Scene Converter: Parsing textures.
Scene Converter: Parsing materials.
Scene Converter: Parsing animations.
Scene Converter: Parsing meshes.
Scene Converter: Parsing nodes.
Scene Converter: Scene info:
Scene Converter:   Number of textures: 0
Scene Converter:   Number of materials: 1
Scene Converter:     Material 0000: uc=0 name="DefaultMaterial" ambientColor=ff0c0c0c diffuseColor=ff999999 specularColor=ff999999 emissiveColor=00000000 shininess=4.000000 numTextures=0
Scene Converter:   Number of animations: 1
Scene Converter:     Animation 0000: uc=0 name="Anim0"
Scene Converter:   Number of bones: 0
Scene Converter:   Number of meshes: 1
Scene Converter:     Mesh 0000: uc=0 name="Mesh0" materialName="DefaultMaterial" numFaces=11176 numVertices=26980 numBones=0 nm=0 nc=0
Scene Converter:   Number of nodes: 2
Scene Converter:     Node 0000: uc=0 name="" numChildren=1 numMeshes=0 numBones=0
Scene Converter:       Child 0000: index=0001 name="x3cSTL_BINARYx3e"
Scene Converter:     Node 0001: uc=0 name="x3cSTL_BINARYx3e" numChildren=0 numMeshes=1 numBones=0
Scene Converter:       Mesh 0000: index=0000 name="Mesh0"
Scene Converter:   Skeleton Graph:
Scene Converter:   Model Graph:
Scene Converter:     Node 0000: name="" numMeshes=0
Scene Converter:       Node 0000: name="" numMeshes=0
Scene Converter:         Node 0001: name="x3cSTL_BINARYx3e" numMeshes=1
Scene Converter:           Mesh 0000: index=0000 name="Mesh0"
We can see that the model does not use textures, uses only one material and consists of 26980 vertices and 11176 faces.
Configuration File
Next, we will convert the model and create a resource package.
The Scene Converter tool (similar as the Atlas Generator tool) uses a XML configuration file as input.
As a minimum we have to define the InputScene and the OutputPackage:
<?xml version="1.0"?>
<!-- Copyright 2015 Spraylight GmbH -->

<SceneConverter xmlns="https://murlengine.com">

    <InputScene fileName="easter-island-head/easter-island-head.stl">
    </InputScene>

    <OutputPackage fileName="../packages/model3d" packageId="model3d" createFolders="yes">
        <GraphInstance graphId="GraphInstance" filePrefix="graph_instance" generateMeshes="yes">
        </GraphInstance>
    </OutputPackage>

</SceneConverter>
The parameter -c is used to specify the configuration file. If additionally the parameter -lv is specified, the result is automatically displayed in the Scene Viewer :
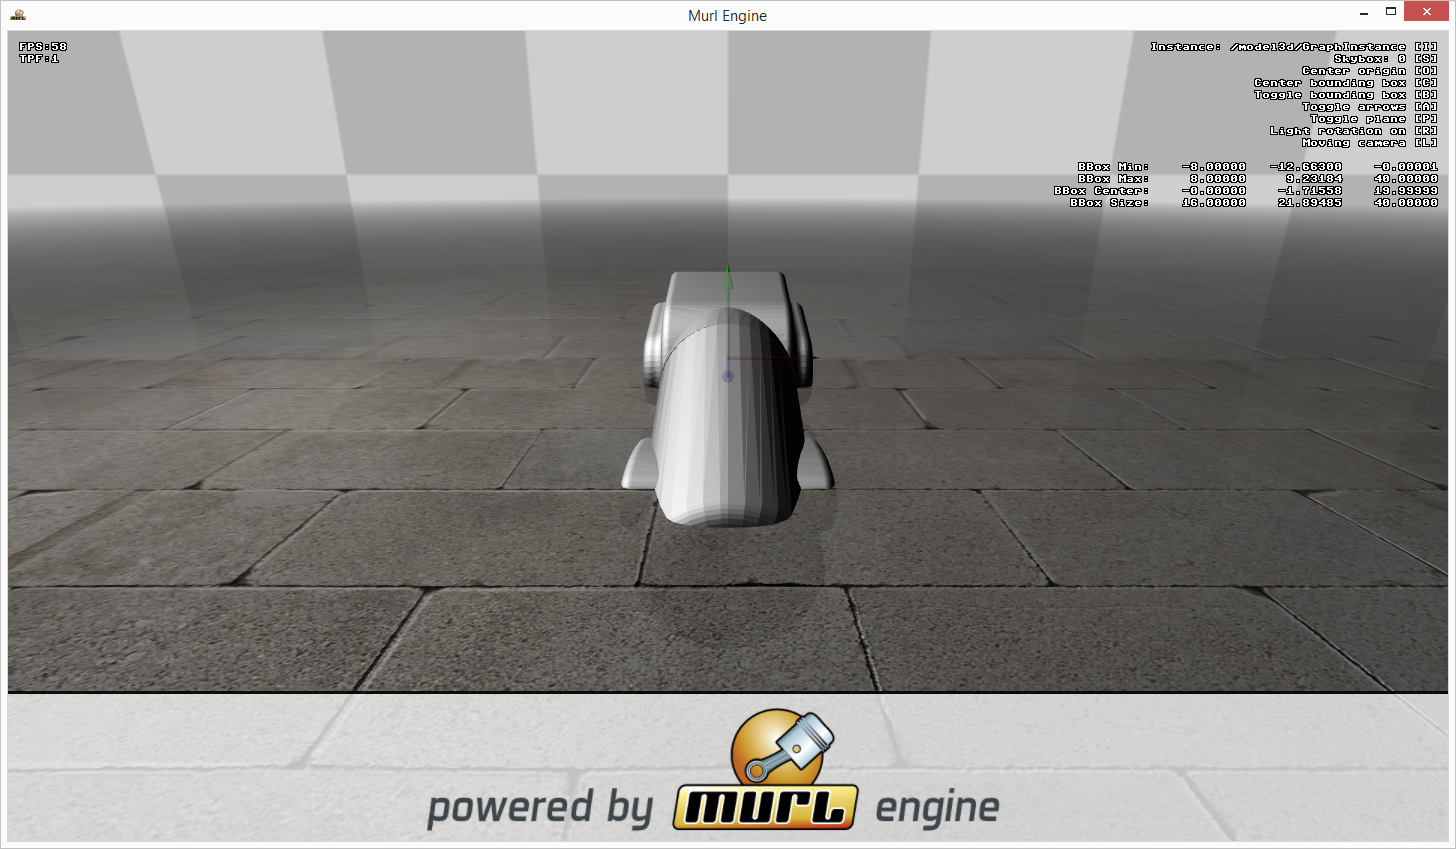
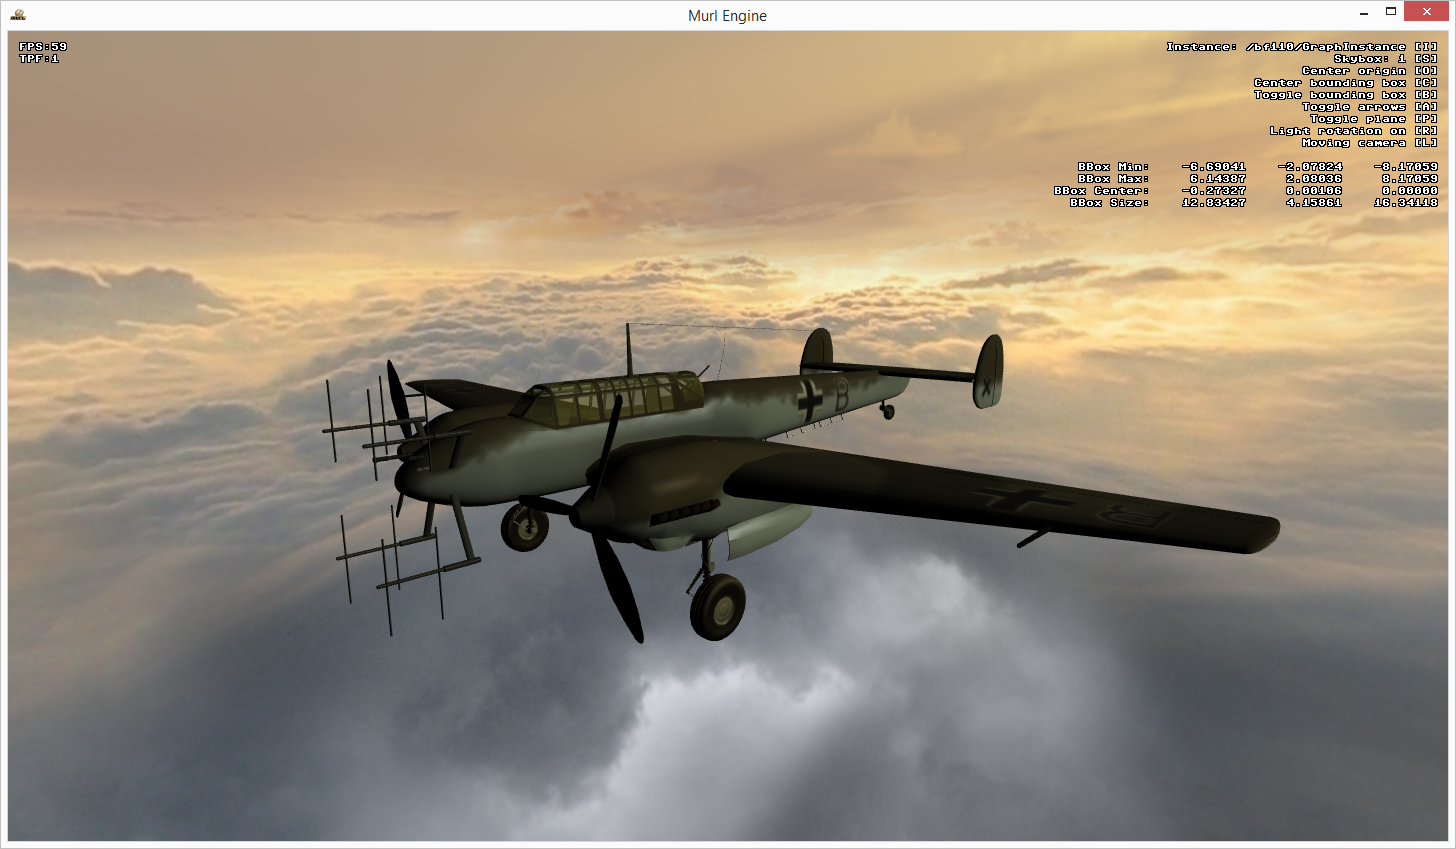
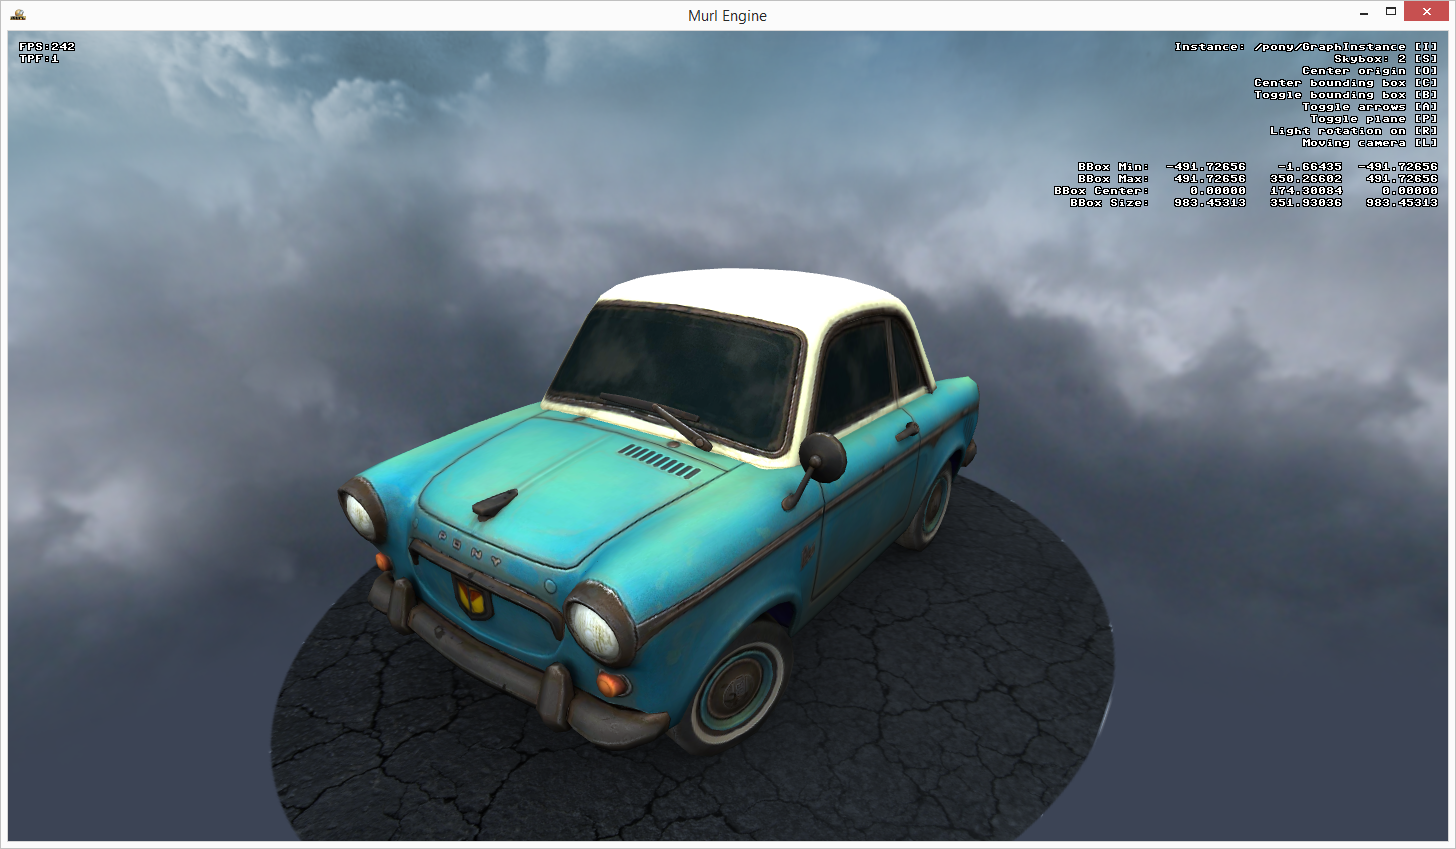
The navigation in the Scene Viewer is possible with the cursor keys in combination with the Shift key and the Alt key. The keyboard can also be used to toggle various elements. For example the key B can be used to display the bounding box of the model and the key S can be used to switch between different skyboxes. The assignment of the keys and the values of the bounding box are displayed on the upper right.
We can make further assignments in the XML configuration file and adapt the model for our purpose (e.g. with translateX/Y/Z, rotateX/Y/Z, scale). We generalize the XML configuration file and specify the parameters with custom attributes:
<?xml version="1.0"?>
<!-- Copyright 2015 Spraylight GmbH -->

<SceneConverter xmlns="https://murlengine.com" sceneId="Scene" translateX="0" translateY="0" translateZ="0" rotateX="0d" rotateY="0d" rotateZ="0d" scale="1" outPath="../packages/" packageName="model3d">

    <InputScene id="{sceneId}" fileName="{inputName}"
        translateX="{translateX}" translateY="{translateY}" translateZ="{translateZ}"
        rotateX="{rotateX}" rotateY="{rotateY}" rotateZ="{rotateZ}"
        scale="{scale}">
    </InputScene>

    <OutputPackage fileName="{outPath}{packageName}" packageId="{packageName}" createFolders="yes">
        <GraphInstance graphId="GraphInstance" filePrefix="graph_instance" generateMeshes="yes">
        </GraphInstance>
    </OutputPackage>

</SceneConverter>
The attributes are set with the parameter -a. We use rotateX to rotate the 3D model and translateZ to move the 3D model into the center of the X/Z plane.
Now the orientation of the converted model is correct.
Load Package and Display 3D Model
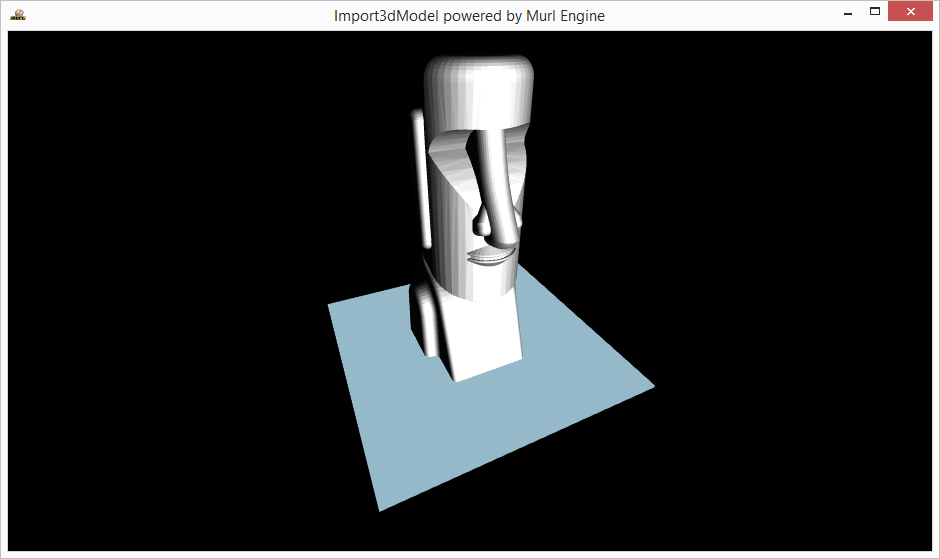
The created package is stored in the folder ../packages/model3d.murlres, as specified in the XML configuration file. We can load this package in our app code just like every other resource package.
loader->AddPackage("model3d", ILoader::LOAD_MODE_BACKGROUND);
To display the 3D model, we have to instantiate it in our scene graph. As specified in the XML configuration file, the resource package name is model3d and the id of the 3D model is GraphInstance:
<Instance graphResourceId="/model3d/GraphInstance"/>
Additionally, we need to create a light source to get a properly rendered image:
    <Light id="light01" type="DIRECTIONAL"/>
    <LightState lightId="light01"/>
As a result the 3D model is displayed within our scene.
Custom Material
By taking a deeper look at the created resource package, we can see that in the package a particular material is created and instantiated:
<?xml version="1.0" ?>

<Graph>
  <Namespace id="Materials" activeAndVisible="NO">
    <!-- DefaultMaterial -->
    <FixedProgram id="FixedProgram0" lightingEnabled="yes" coloringEnabled="yes"/>
    <Material id="Material0" programId="FixedProgram0"/>

  </Namespace>
</Graph>
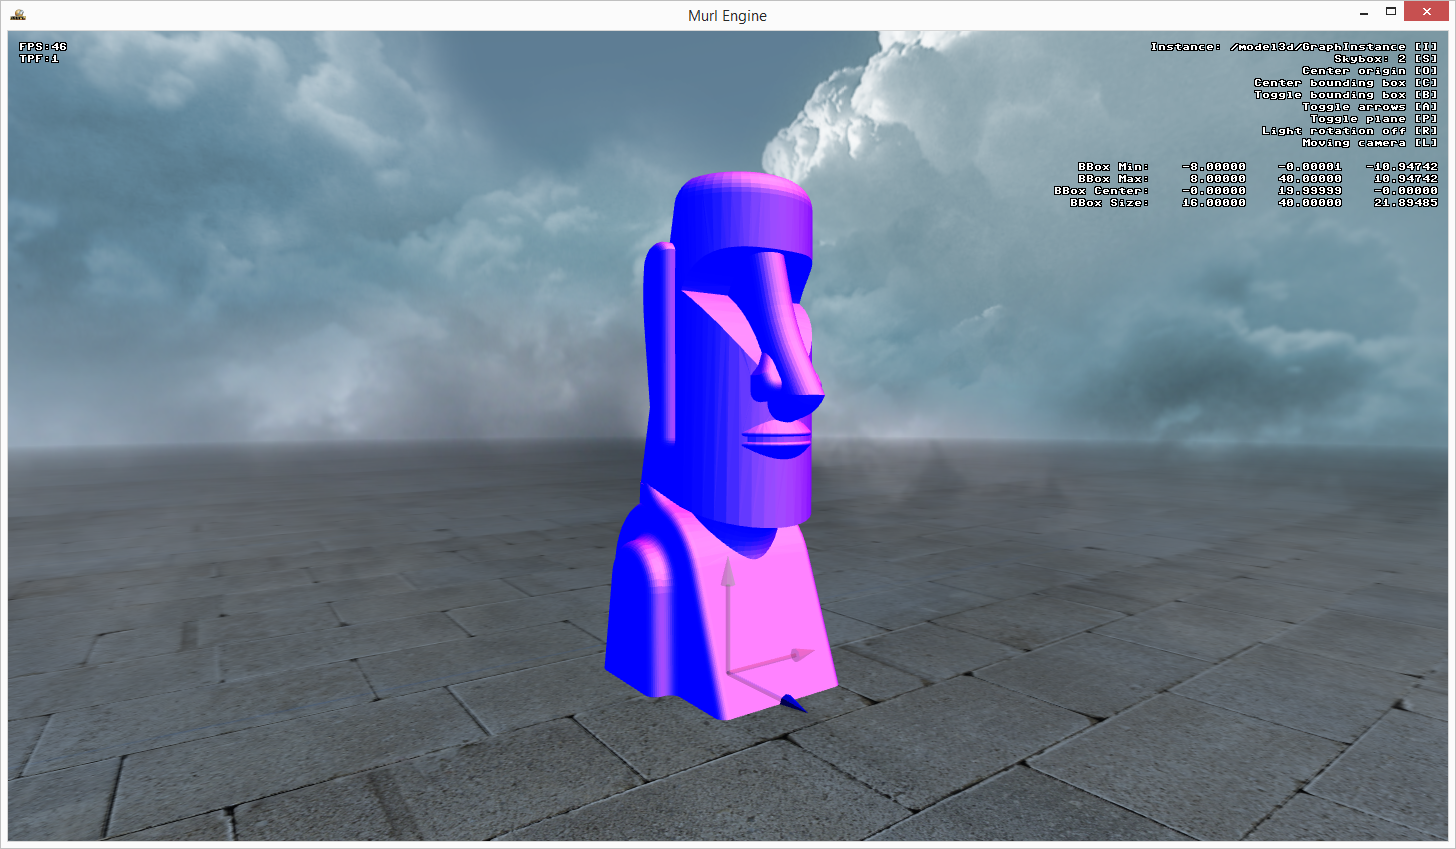
We can replace this material with our own material. To do that, we change the configuration file and replace all materials with our material /myMaterial/mat_color_light_alpha and in addition specify diffuseColor and ambientColor.
When we now convert the model with the Scene Converter, the model is rendered in the app using our material. Anyway, nothing is displayed in the Scene Viewer. This is the case because the Scene Viewer does not know the material /myMaterial/mat_color_light_alpha. We need to additionally use the InputPackage parameter to specify the package that contains the material.
<?xml version="1.0"?>
<!-- Copyright 2015 Spraylight GmbH -->

<SceneConverter xmlns="https://murlengine.com" sceneId="Scene" ignoreFiles="no" translateX="0" translateY="0" translateZ="0" rotateX="0d" rotateY="0d" rotateZ="0d" scale="1" outPath="../packages/" packageName="model3d">

    <InputPackage fileName="../packages/materials.murlres"/>

    <InputScene id="{sceneId}" fileName="{inputName}"
        translateX="{translateX}" translateY="{translateY}" translateZ="{translateZ}"
        rotateX="{rotateX}" rotateY="{rotateY}" rotateZ="{rotateZ}"
        scale="{scale}">

        <Material findIdMatchingPattern="*"
            replaceWithGraphNodeId="/myMaterial/mat_color_light"
            diffuseColor="1f,0f,0f,1.0f"
            ambientColor="0f,0f,1f,1.0f"
        />

    </InputScene>

    <OutputPackage fileName="{outPath}{packageName}" packageId="{packageName}" createFolders="yes">
        <GraphInstance graphId="GraphInstance" filePrefix="graph_instance" generateMeshes="yes">
        </GraphInstance>
    </OutputPackage>

</SceneConverter>
Now the 3D model is also rendered in the Scene Viewer :
- Note
- Hint! It is advisable to define the materials in a separate package to be able to use it in the Scene Viewer as well as in the application.
Multiple Instances
Multiple instances of the same 3D model (or different 3D models) may quickly lead to name conflicts. To avoid such conflicts a namespaceId should be specified for each instance:
    <Instance graphResourceId="model3d:GraphInstance"
        namespaceId="easter_island"
    />
In addition to the namespaceId attribute also other attributes are supported (see model3d.murlres/graph/graph_instance.xml):
    <Instance graphResourceId="model3d:GraphInstance"
        namespaceId="easter_island"
        useAnimations="YES"
        useMaterials="YES"
        useParameters="YES"
        useTextures="YES"
        useSurfaces="YES"
        useModel="YES"
    />
Messerschmitt Bf 110
This model is named Messerschmitt Bf 110, has been created by helijah and is licensed under the Creative Commons Attribution license. The ZIP archive contains the 3D model in the OBJ file format and several textures in the PNG format.
A conversion without additional instructions generates an error message because the texture images cannot be found:
Murl Scene Converter V1.00.5467 beta, Copyright 2010-2015 Spraylight GmbH
Scene Converter: Processing XML file "scene_config_bf110.xml"
Scene Converter: Importing scene from file 'bf110/bf110.obj'.
Scene Converter: Loading scene file 'bf110/bf110.obj'.
Scene Converter: Parsing textures.
Scene Converter: Parsing materials.
Scene Converter: Creating material texture for type 1 from file 'texture.png'.
Scene Converter: Error Failed to load texture file 'texture.png' for texture 'texture.png'

Scene Converter: Error Failed to parse materials from file 'bf110/bf110.obj'.
Scene Converter: Error Failed to import file 'bf110/bf110.obj'.
By specifying the ImageLocation the model can be converted without any problem:
<?xml version="1.0"?>
<!-- Copyright 2015 Spraylight GmbH -->

<SceneConverter xmlns="https://murlengine.com" sceneId="Scene" ignoreFiles="no" translateX="0" translateY="0" translateZ="0" rotateX="0d" rotateY="0d" rotateZ="0d" scale="1" outPath="../packages/" packageName="model3d">

    <InputScene id="{sceneId}" fileName="{inputName}"
        translateX="{translateX}" translateY="{translateY}" translateZ="{translateZ}"
        rotateX="{rotateX}" rotateY="{rotateY}" rotateZ="{rotateZ}"
        scale="{scale}">

        <ImageLocation pathName="./bf110"/>

    </InputScene>

    <OutputPackage fileName="{outPath}{packageName}" packageId="{packageName}" createFolders="yes">
        <GraphInstance graphId="GraphInstance" filePrefix="graph_instance" generateMeshes="yes">
        </GraphInstance>
    </OutputPackage>

</SceneConverter>
Messerschmitt Bf 110 Multipass
We can replace the material also for this model. But in this case we need more than one material, because the model uses textured geometry as well as non-textured, transparent geometry for the glass top.
First of all, we analyze the model to determine the names of the materials:
...
Scene Converter:   Number of materials: 21
Scene Converter:     Material 0000: uc=0 name="DefaultWhite" ambientColor=ff000000 diffuseColor=ffcccccc specularColor=ff7f7f7f emissiveColor=ff000000 shininess=384.313721 numTextures=1
Scene Converter:       Texture 0000: index=0000 name="texture.png" semantic="DIFFUSE_RED/DIFFUSE_GREEN/DIFFUSE_BLUE/OPACITY_VALUE"
Scene Converter:     Material 0001: uc=0 name="DefaultWhite_ai.png" ambientColor=ff000000 diffuseColor=ffcccccc specularColor=ff7f7f7f emissiveColor=ff000000 shininess=384.313721 numTextures=1
Scene Converter:       Texture 0000: index=0001 name="ai.png" semantic="DIFFUSE_RED/DIFFUSE_GREEN/DIFFUSE_BLUE/OPACITY_VALUE"
Scene Converter:     Material 0002: uc=0 name="DefaultWhite_airspeed.png" ambientColor=ff000000 diffuseColor=ffcccccc specularColor=ff7f7f7f emissiveColor=ff000000 shininess=384.313721 numTextures=1
Scene Converter:       Texture 0000: index=0002 name="airspeed.png" semantic="DIFFUSE_RED/DIFFUSE_GREEN/DIFFUSE_BLUE/OPACITY_VALUE"
Scene Converter:     Material 0003: uc=0 name="DefaultWhite_alt.png" ambientColor=ff000000 diffuseColor=ffcccccc specularColor=ff7f7f7f emissiveColor=ff000000 shininess=384.313721 numTextures=1
Scene Converter:       Texture 0000: index=0003 name="alt.png" semantic="DIFFUSE_RED/DIFFUSE_GREEN/DIFFUSE_BLUE/OPACITY_VALUE"
Scene Converter:     Material 0004: uc=0 name="DefaultWhite_compass.png" ambientColor=ff000000 diffuseColor=ffcccccc specularColor=ff7f7f7f emissiveColor=ff000000 shininess=384.313721 numTextures=1
Scene Converter:       Texture 0000: index=0004 name="compass.png" semantic="DIFFUSE_RED/DIFFUSE_GREEN/DIFFUSE_BLUE/OPACITY_VALUE"
Scene Converter:     Material 0005: uc=0 name="DefaultWhite_compass2.png" ambientColor=ff000000 diffuseColor=ffcccccc specularColor=ff7f7f7f emissiveColor=ff000000 shininess=384.313721 numTextures=1
Scene Converter:       Texture 0000: index=0005 name="compass2.png" semantic="DIFFUSE_RED/DIFFUSE_GREEN/DIFFUSE_BLUE/OPACITY_VALUE"
Scene Converter:     Material 0006: uc=0 name="DefaultWhite_fuel.png" ambientColor=ff000000 diffuseColor=ffcccccc specularColor=ff7f7f7f emissiveColor=ff000000 shininess=384.313721 numTextures=1
Scene Converter:       Texture 0000: index=0006 name="fuel.png" semantic="DIFFUSE_RED/DIFFUSE_GREEN/DIFFUSE_BLUE/OPACITY_VALUE"
Scene Converter:     Material 0007: uc=0 name="DefaultWhite_gear.png" ambientColor=ff000000 diffuseColor=ffcccccc specularColor=ff7f7f7f emissiveColor=ff000000 shininess=384.313721 numTextures=1
Scene Converter:       Texture 0000: index=0007 name="gear.png" semantic="DIFFUSE_RED/DIFFUSE_GREEN/DIFFUSE_BLUE/OPACITY_VALUE"
Scene Converter:     Material 0008: uc=0 name="DefaultWhite_guns.png" ambientColor=ff000000 diffuseColor=ffcccccc specularColor=ff7f7f7f emissiveColor=ff000000 shininess=384.313721 numTextures=1
Scene Converter:       Texture 0000: index=0008 name="guns.png" semantic="DIFFUSE_RED/DIFFUSE_GREEN/DIFFUSE_BLUE/OPACITY_VALUE"
Scene Converter:     Material 0009: uc=0 name="DefaultWhite_interior.png" ambientColor=ff000000 diffuseColor=ffcccccc specularColor=ff7f7f7f emissiveColor=ff000000 shininess=384.313721 numTextures=1
Scene Converter:       Texture 0000: index=0009 name="interior.png" semantic="DIFFUSE_RED/DIFFUSE_GREEN/DIFFUSE_BLUE/OPACITY_VALUE"
Scene Converter:     Material 0010: uc=0 name="DefaultWhite_jauges.png" ambientColor=ff000000 diffuseColor=ffcccccc specularColor=ff7f7f7f emissiveColor=ff000000 shininess=384.313721 numTextures=1
Scene Converter:       Texture 0000: index=0010 name="jauges.png" semantic="DIFFUSE_RED/DIFFUSE_GREEN/DIFFUSE_BLUE/OPACITY_VALUE"
Scene Converter:     Material 0011: uc=0 name="DefaultWhite_man.png" ambientColor=ff000000 diffuseColor=ffcccccc specularColor=ff7f7f7f emissiveColor=ff000000 shininess=384.313721 numTextures=1
Scene Converter:       Texture 0000: index=0011 name="man.png" semantic="DIFFUSE_RED/DIFFUSE_GREEN/DIFFUSE_BLUE/OPACITY_VALUE"
Scene Converter:     Material 0012: uc=0 name="DefaultWhite_manette.png" ambientColor=ff000000 diffuseColor=ffcccccc specularColor=ff7f7f7f emissiveColor=ff000000 shininess=384.313721 numTextures=1
Scene Converter:       Texture 0000: index=0012 name="manette.png" semantic="DIFFUSE_RED/DIFFUSE_GREEN/DIFFUSE_BLUE/OPACITY_VALUE"
Scene Converter:     Material 0013: uc=0 name="DefaultWhite_manettes.png.001" ambientColor=ff000000 diffuseColor=ffcccccc specularColor=ff7f7f7f emissiveColor=ff000000 shininess=384.313721 numTextures=1
Scene Converter:       Texture 0000: index=0013 name="manettes.png" semantic="DIFFUSE_RED/DIFFUSE_GREEN/DIFFUSE_BLUE/OPACITY_VALUE"
Scene Converter:     Material 0014: uc=0 name="DefaultWhite_panel.png" ambientColor=ff000000 diffuseColor=ffcccccc specularColor=ff7f7f7f emissiveColor=ff000000 shininess=384.313721 numTextures=1
Scene Converter:       Texture 0000: index=0014 name="panel.png" semantic="DIFFUSE_RED/DIFFUSE_GREEN/DIFFUSE_BLUE/OPACITY_VALUE"
Scene Converter:     Material 0015: uc=0 name="DefaultWhite_pedals.png" ambientColor=ff000000 diffuseColor=ffcccccc specularColor=ff7f7f7f emissiveColor=ff000000 shininess=384.313721 numTextures=1
Scene Converter:       Texture 0000: index=0015 name="pedals.png" semantic="DIFFUSE_RED/DIFFUSE_GREEN/DIFFUSE_BLUE/OPACITY_VALUE"
Scene Converter:     Material 0016: uc=0 name="DefaultWhite_throttle.png" ambientColor=ff000000 diffuseColor=ffcccccc specularColor=ff7f7f7f emissiveColor=ff000000 shininess=384.313721 numTextures=1
Scene Converter:       Texture 0000: index=0016 name="throttle.png" semantic="DIFFUSE_RED/DIFFUSE_GREEN/DIFFUSE_BLUE/OPACITY_VALUE"
Scene Converter:     Material 0017: uc=0 name="DefaultWhite_turn.png" ambientColor=ff000000 diffuseColor=ffcccccc specularColor=ff7f7f7f emissiveColor=ff000000 shininess=384.313721 numTextures=1
Scene Converter:       Texture 0000: index=0017 name="turn.png" semantic="DIFFUSE_RED/DIFFUSE_GREEN/DIFFUSE_BLUE/OPACITY_VALUE"
Scene Converter:     Material 0018: uc=0 name="DefaultWhite_vsi.png" ambientColor=ff000000 diffuseColor=ffcccccc specularColor=ff7f7f7f emissiveColor=ff000000 shininess=384.313721 numTextures=1
Scene Converter:       Texture 0000: index=0018 name="vsi.png" semantic="DIFFUSE_RED/DIFFUSE_GREEN/DIFFUSE_BLUE/OPACITY_VALUE"
Scene Converter:     Material 0019: uc=0 name="transparent" ambientColor=ff000000 diffuseColor=26cccccc specularColor=ff7f7f7f emissiveColor=ff000000 shininess=384.313721 numTextures=0
Scene Converter:     Material 0020: uc=0 name="transparentExt" ambientColor=ff000000 diffuseColor=4c66cccc specularColor=ff7fffff emissiveColor=ff000000 shininess=384.313721 numTextures=0
...
Obviously the model uses 21 different materials in total and only the materials transparent and transparentExt do not use textures. We replace these two materials with mat_color_alpha and all other materials with mat_color_light_texture.
<?xml version="1.0"?>
<!-- Copyright 2015 Spraylight GmbH -->

<SceneConverter xmlns="https://murlengine.com" sceneId="Scene" ignoreFiles="no" translateX="0" translateY="0" translateZ="0" rotateX="0d" rotateY="0d" rotateZ="0d" scale="1" outPath="../packages/" packageName="model3d">

    <InputPackage fileName="../packages/materials.murlres"/>

    <InputScene id="{sceneId}" fileName="{inputName}"
        translateX="{translateX}" translateY="{translateY}" translateZ="{translateZ}"
        rotateX="{rotateX}" rotateY="{rotateY}" rotateZ="{rotateZ}"
        scale="{scale}">

        <ImageLocation pathName="./bf110"/>

        <Material findIdMatchingPattern="*"
            replaceWithGraphNodeId="/myMaterial/mat_color_light_texture"
        />
        <Material findIdMatchingPattern="transparent*"
            replaceWithGraphNodeId="/myMaterial/mat_color_alpha"
            ambientColor="0.5f,0f,0f,0f"
        />

    </InputScene>

    <OutputPackage fileName="{outPath}{packageName}" packageId="{packageName}" createFolders="yes">
        <GraphInstance graphId="GraphInstance" filePrefix="graph_instance" generateMeshes="yes">
        </GraphInstance>
    </OutputPackage>

</SceneConverter>
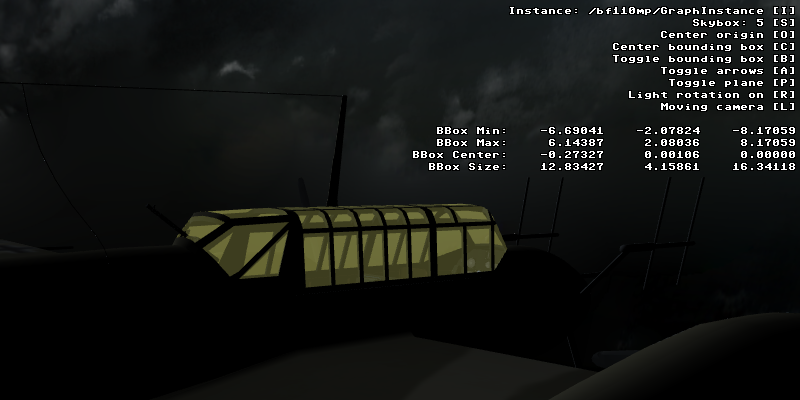
The airplane is now rendered with our materials:
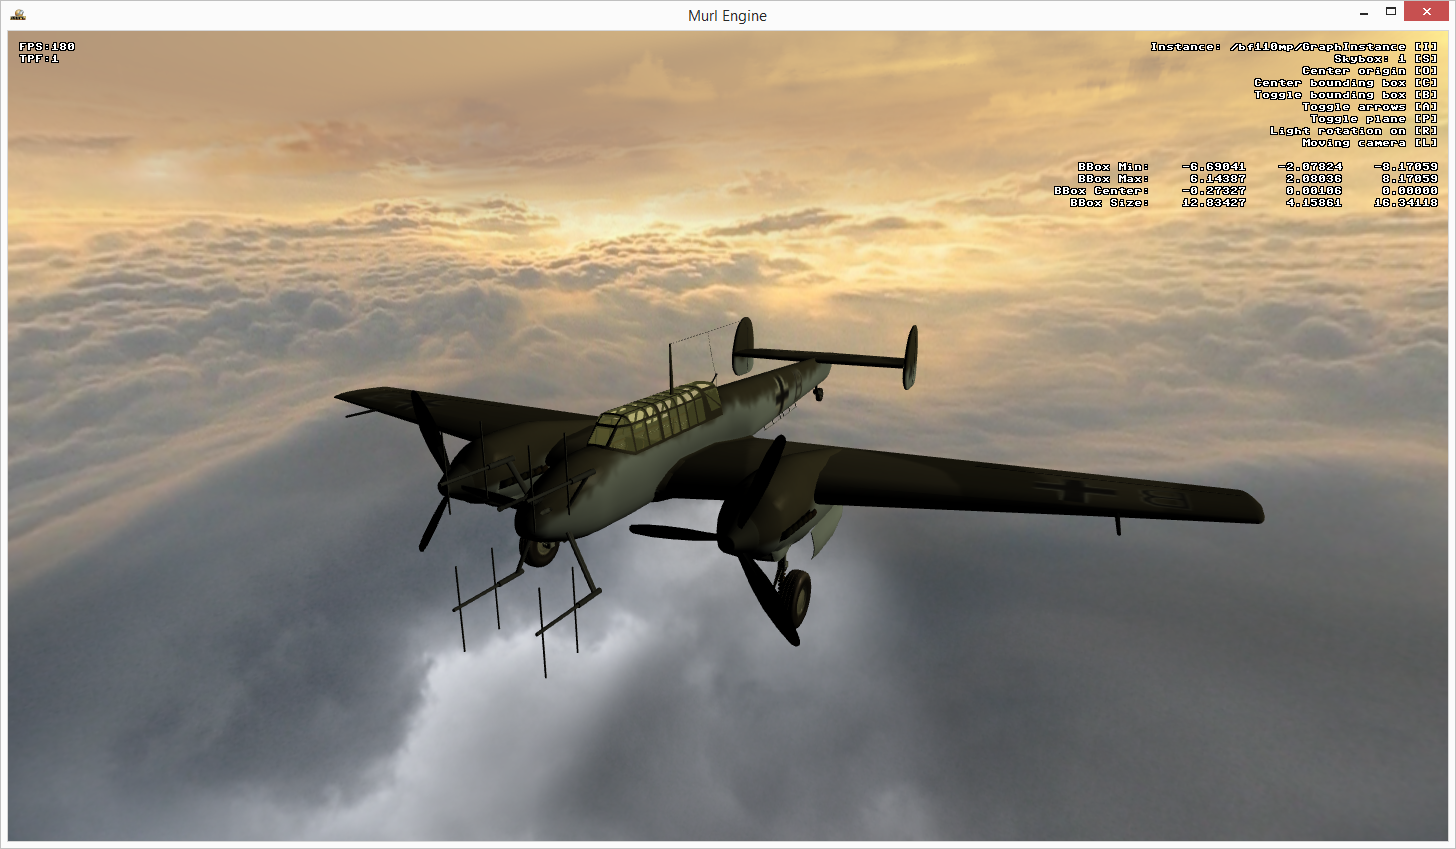
At first sight the result looks faultlessly. The textured faces as well as the transparent faces are rendered with the correct material.
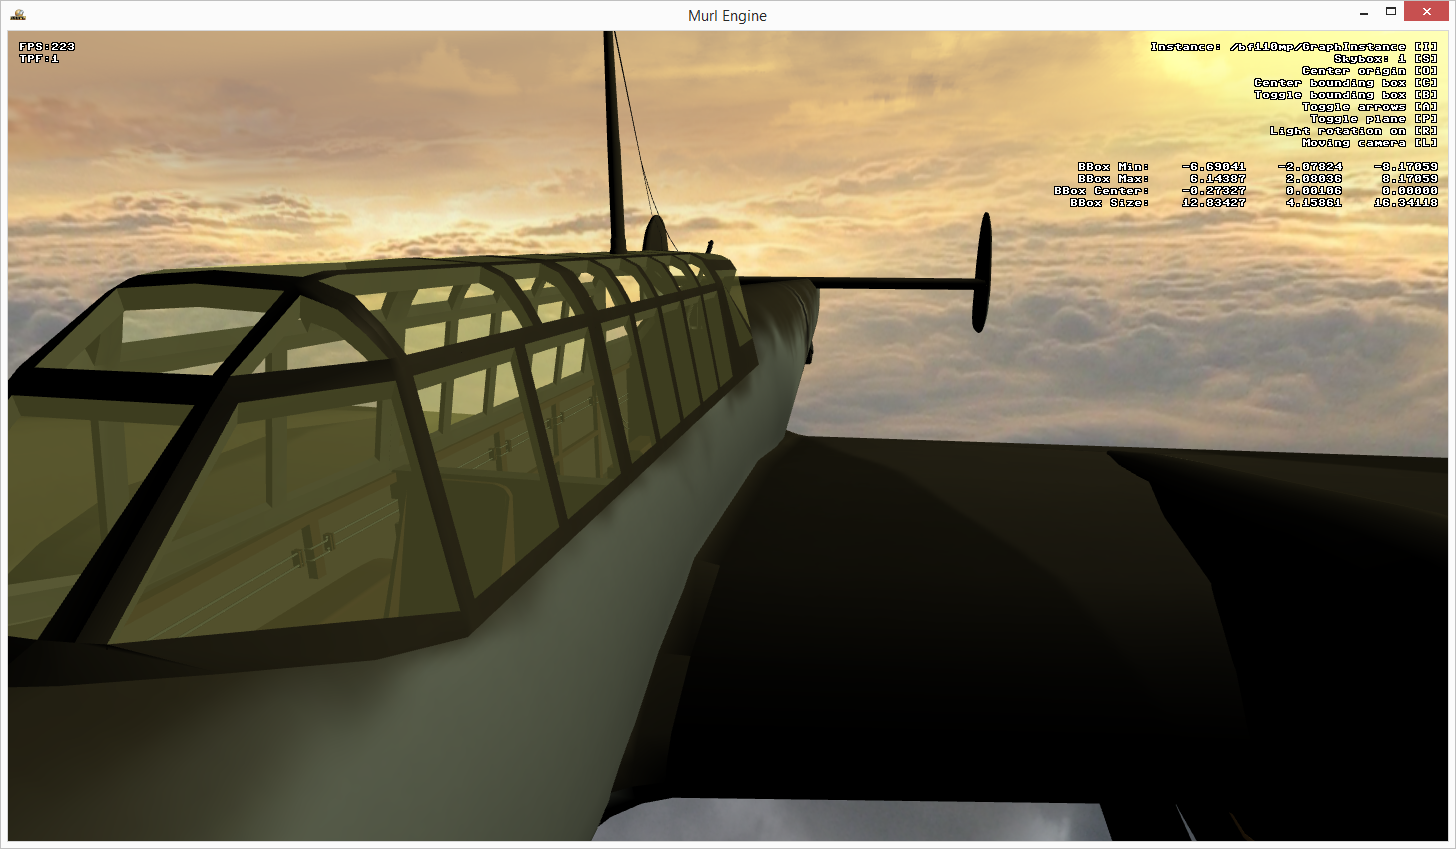
But a closer look reveals a problem:
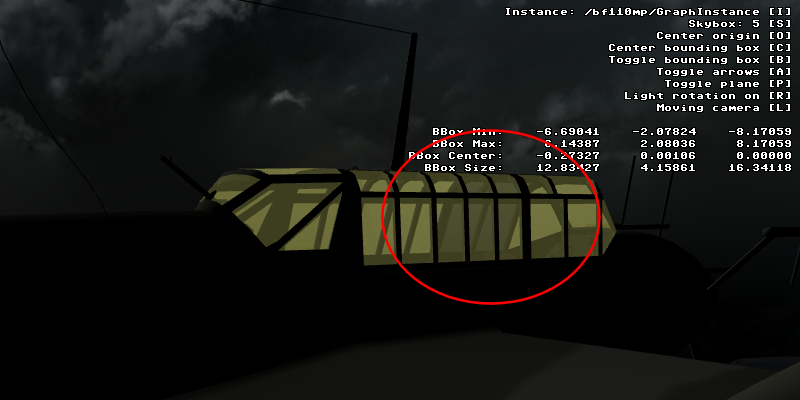
In this view two windows are rendered darker than the others. The cause for this issue is the draw order of the geometries and the activated depth buffer mode of the transparent material (depthBufferMode="READ_AND_WRITE"). If a transparent window has been drawn, afterwards no faces are drawn which are located behind the already drawn window. To render transparent faces correctly, they need to be drawn in the correct order (sorted from back to front). See also Order Independent Transparency.
To improve the result, we can change the depth buffer mode of the transparent material to "READ_ONLY". Thus at first the opaque geometry is drawn with depthBufferMode="READ_AND_WRITE" and afterwards the transparent geometry is drawn with depthBufferMode="READ_ONLY" (see also Tutorial #14: Render Order).
This is working well because all transparent faces are drawn with the same color (without consideration of light).
If light should be considered, we can render the transparent geometry with a Graph::MultiMaterial. The transparent geometry is then drawn twice. In the first pass only faces which look away from the camera are drawn (visibleFaces="BACK_ONLY") and in the second pass only faces which look to the camera (visibleFaces="FRONT_ONLY") are drawn. For this we define two materials, specify the sortOrder and combine the two materials to one Graph::MultiMaterial.
    <Material id="mat_color_light_alpha_back"
    programId="prg_color_light"
    visibleFaces="BACK_ONLY"
    blendMode="ALPHA"
    depthBufferMode="READ_ONLY"
    sortOrder="1"
    />
    <Material id="mat_color_light_alpha_front"
    programId="prg_color_light"
    visibleFaces="FRONT_ONLY"
    blendMode="ALPHA"
    depthBufferMode="READ_ONLY"
    sortOrder="2"
    />
    <MultiMaterial id="mat_color_light_alpha_twopass"
    materialIds="mat_color_light_alpha_back,mat_color_light_alpha_front"
    />
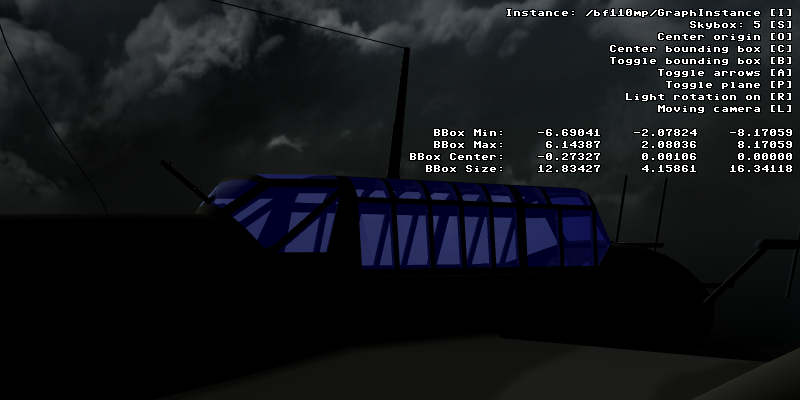
We use this Graph::MultiMaterial to render the transparent geometry. In addition we change the ambientColor to create a blueish appearance.
    <Material findIdMatchingPattern="transparent*"
        replaceWithGraphNodeId="/myMaterial/mat_color_light_alpha_twopass"
        ambientColor="0.0f,0f,0.5f,1f"
    />
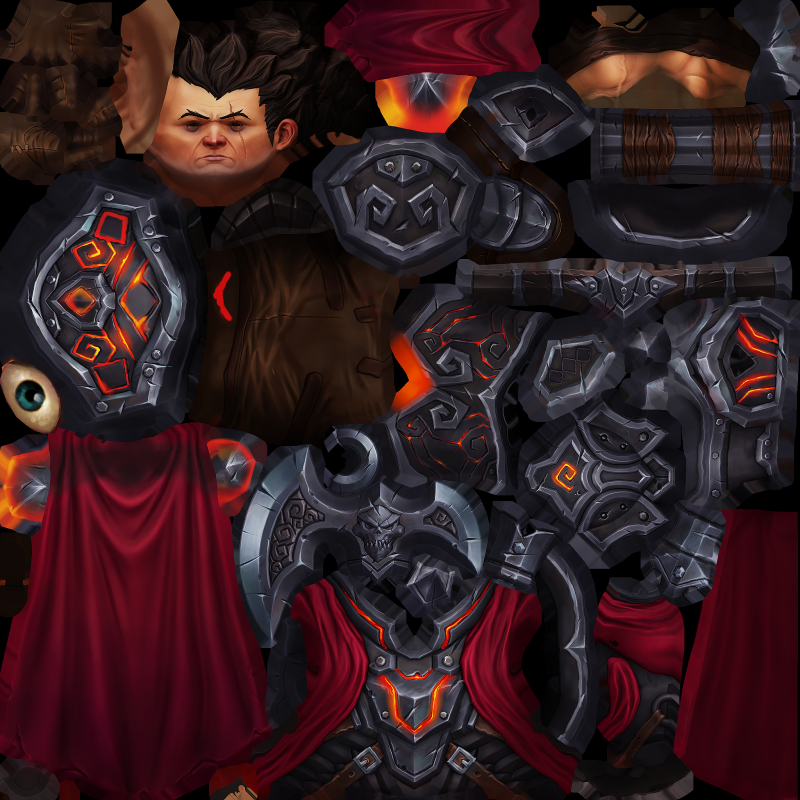
Darius
This model is named Darius, has been created by kraken and is licensed under the Creative Commons Attribution license. The ZIP archive contains the 3D model in the OBJ file format and one texture in the TGA format.
The Scene Converter analysis produces the following result:
Murl Scene Converter V1.00.5534 beta, Copyright 2010-2015 Spraylight GmbH
Scene Converter: Analyzing scene from file 'darius\Darius.obj'
Scene Converter: Loading scene file 'darius\Darius.obj'.
Scene Converter: Parsing textures.
Scene Converter: Parsing materials.
Scene Converter: Parsing animations.
Scene Converter: Parsing meshes.
Scene Converter: Parsing nodes.
Scene Converter: Scene info:
Scene Converter:   Number of textures: 0
Scene Converter:   Number of materials: 1
Scene Converter:     Material 0000: uc=0 name="DefaultMaterial" ambientColor=ff000000 diffuseColor=ff999999 specularColor=ff000000 emissiveColor=ff000000 shininess=0.000000 numTextures=0
Scene Converter:   Number of animations: 1
Scene Converter:     Animation 0000: uc=0 name="Anim0"
Scene Converter:   Number of bones: 0
Scene Converter:   Number of meshes: 1
Scene Converter:     Mesh 0000: uc=0 name="Mesh0" materialName="DefaultMaterial" numFaces=8087 numVertices=7125 numBones=0 nm=0 nc=0
Scene Converter:   Number of nodes: 3
Scene Converter:     Node 0000: uc=0 name="" numChildren=1 numMeshes=0 numBones=0
Scene Converter:       Child 0000: index=0001 name="Darius.obj"
Scene Converter:     Node 0001: uc=0 name="Darius.obj" numChildren=1 numMeshes=0 numBones=0
Scene Converter:       Child 0000: index=0002 name="gx20default043"
Scene Converter:     Node 0002: uc=0 name="gx20default043" numChildren=0 numMeshes=1 numBones=0
Scene Converter:       Mesh 0000: index=0000 name="Mesh0"
Scene Converter:   Skeleton Graph:
Scene Converter:   Model Graph:
Scene Converter:     Node 0000: name="" numMeshes=0
Scene Converter:       Node 0000: name="" numMeshes=0
Scene Converter:         Node 0001: name="Darius.obj" numMeshes=0
Scene Converter:           Node 0002: name="gx20default043" numMeshes=1
Scene Converter:             Mesh 0000: index=0000 name="Mesh0"
There are two problems with this model:
First, the texture is provided in the TGA file format, an image format which is not supported by the Murl Engine. We therefore convert the image into the PNG file format.
Secondly, the defined material incorrectly does not use textures. If we convert the model, it is in fact rendered without textures.
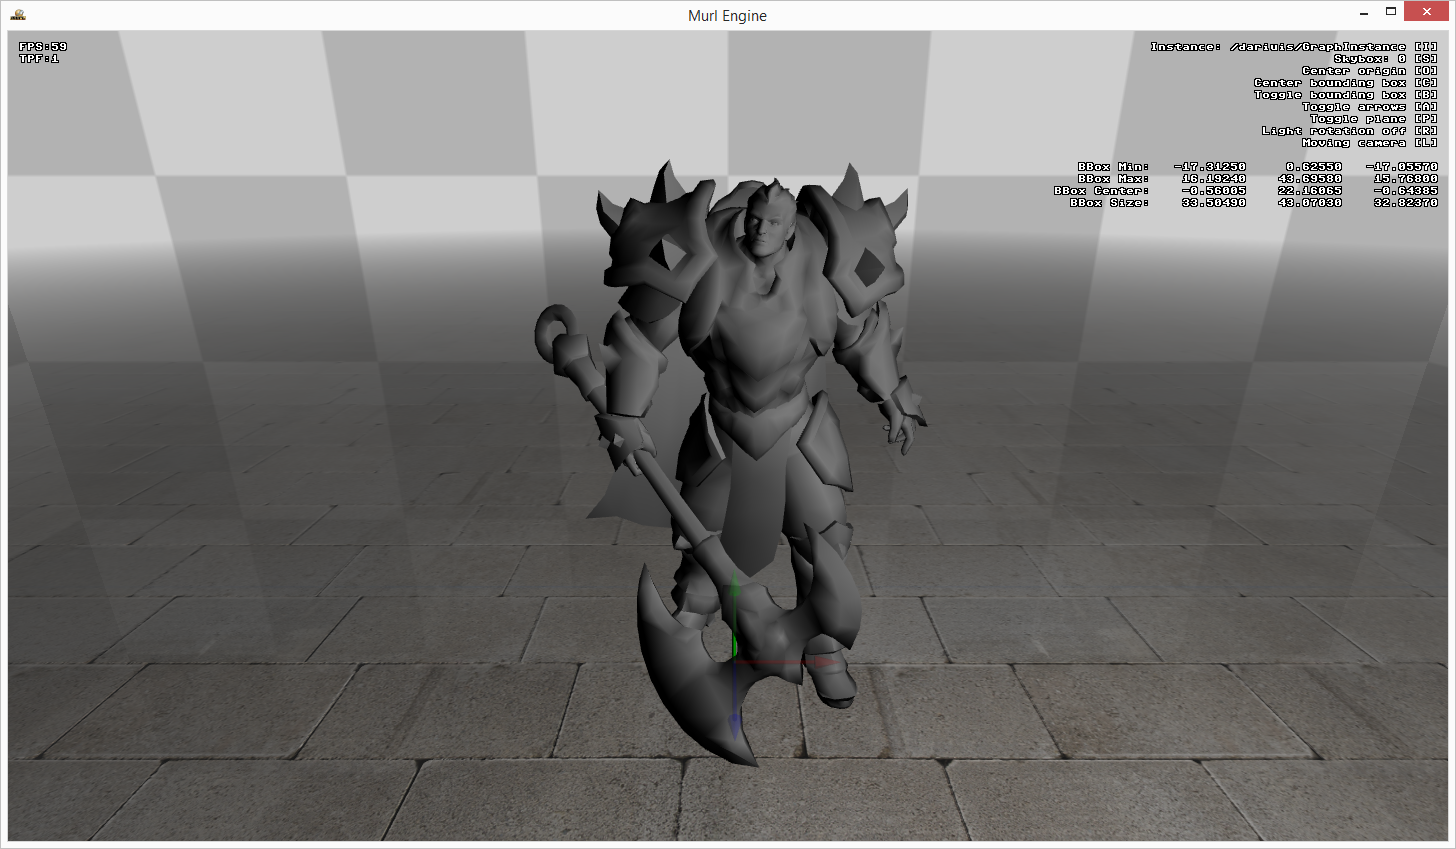
We have to manually add the texture to the material:
    <ImageLocation pathName="./darius"/>
    <Material findIdMatchingPattern="*">
        <Texture createWithFileName="Darius_color.png"/>
    </Material>
Now the 3D model is rendered with the correct texture (left picture).
We can further improve the result if we specify an ambientColor to brighten up the colors. In addition we use the attributes sizeX and sizeY to reduce the texture size from 2048x2048 pixel to 1024x1024 pixel (right picture).
    <ImageLocation pathName="./darius"/>
    <Material findIdMatchingPattern="*"
         ambientColor="ffffffff">
        <Texture createWithFileName="Darius_color.png" sizeX="1024" sizeY="1024"/>
    </Material>

Pony
This model is named Pony, has been created by Slava Zhuravlev and is licensed under the Creative Commons Attribution license.
- Note
- The author now removed the download option on Sketchfab and also changed the model slightly. Anyway, a similar model, Pony Cartoon, can still be downloaded and used for free. Thx @SaphireSouldier for the notice.
The RAR archive contains the 3D model in the OBJ file format and several textures.
We get error messages when we try to convert the model, because some textures cannot be found and one texture file format is not supported:
Scene Converter: Creating material texture for type 5 from file 'normalmap_dDo_n_2.png -bm 1'.
Scene Converter: Error Failed to load texture file 'normalmap_dDo_n_2.png -bm 1' for texture 'normalmap_dDo_n_2.png -bm 1'

Scene Converter: Creating material texture for type 5 from file 'interior_normalmap_2.PNG -bm 1'.
Scene Converter: Error Failed to load texture file 'interior_normalmap_2.PNG -bm 1' for texture 'interior_normalmap_2.PNG -bm 1'

Scene Converter: Creating material texture for type 1 from file 'Road_diffuse.psd'.
Scene Converter: Error Failed to decode texture 'Road_diffuse.psd'
Scene Converter: Error Failed to load texture file 'Road_diffuse.psd' for texture 'Road_diffuse.psd'
We have to convert the PSD file to a PNG file and correct the names for some textures:
    <ImageLocation pathName="./pony"/>
    <Texture findFileNameMatchingPattern="normalmap_dDo_n_2.png -bm 1" replaceWithFileName="normalmap_dDo_n_2.png"/>;
    <Texture findFileNameMatchingPattern="interior_normalmap_2.PNG -bm 1" replaceWithFileName="interior_normalmap_2.jpg"/>;
    <Texture findFileNameMatchingPattern="Road_diffuse.psd" replaceWithFileName="Road_diffuse.png"/>;
Now we are able to convert the model but the render result is completely black (left picture). We correct the color parameters for all materials to fix this issue:
<Material findIdMatchingPattern="*" ambientColor="1f,1f,1f,1f" diffuseColor="1f,1f,1f,1f" specularColor="0.4f,0.4f,0.4f,1f" shininess="10"/>
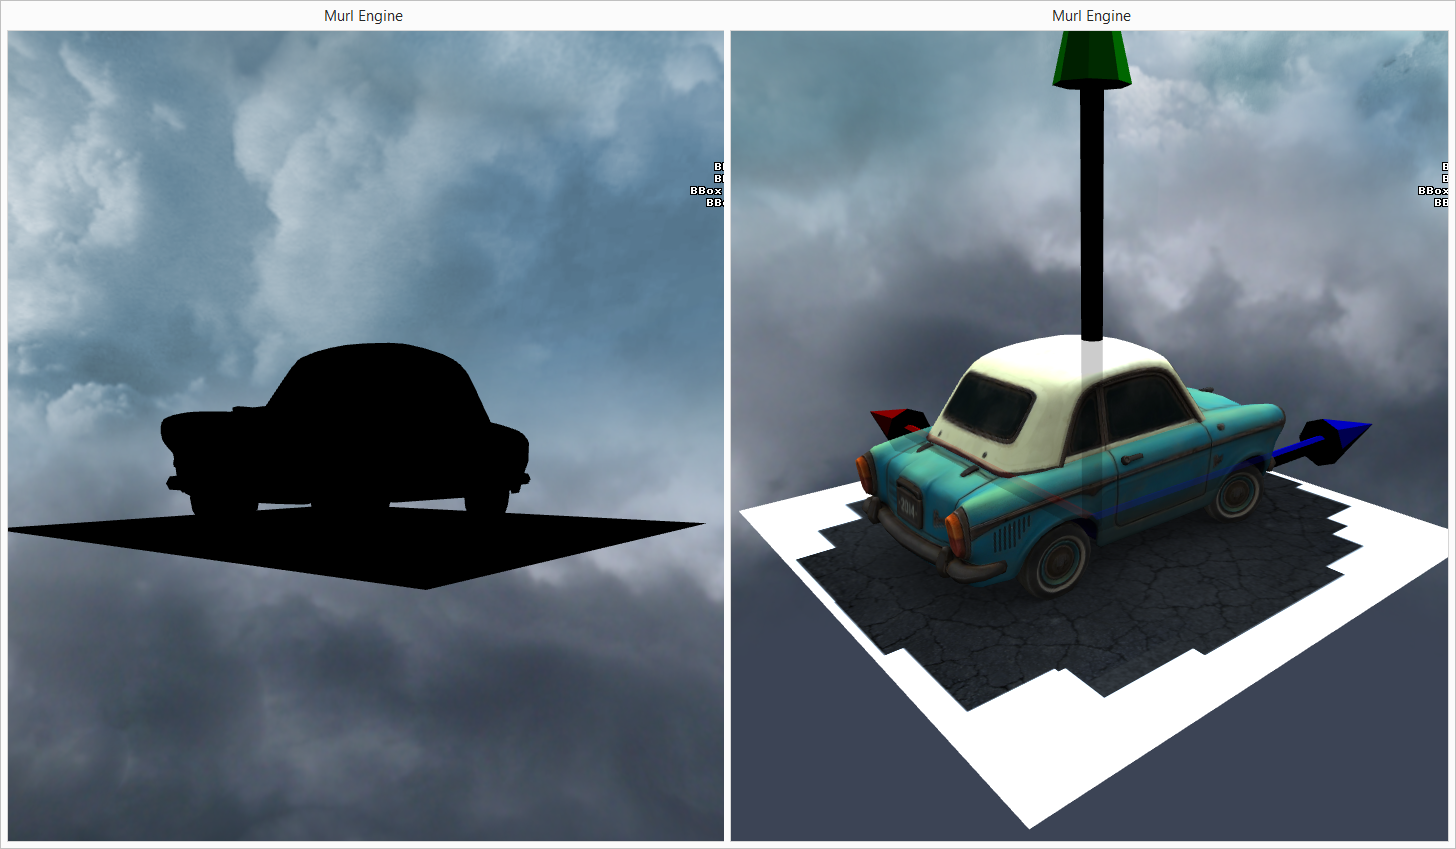
The result is better but the ground plane is rendered without transparency (right picture). We correct the material for the ground plane and get a satisfying result:
<Material findIdMatchingPattern="lambert3SG" blendMode="ALPHA"/>
A final issue still exists: The windows of the car are rendered opaque but should be transparent. The reason for this issue is that according to the Scene Converter analysis the transparency (OPACITY_VALUE) is stored in the alpha channel of the diffuse texture.
Scene Converter: Texture 0000: index=0000 name="normalmap_dDo_d.jpg" semantic="DIFFUSE_RED/DIFFUSE_GREEN/DIFFUSE_BLUE/OPACITY_VALUE"
The diffuse texture is provided as a JPG image, a file format which does not support an alpha channel. The transparency information therefore got lost. The only way to fix this issue would be to store the texture in PNG format and use a graphics editor to redraw the windows in the alpha channel.
- Note
- Hint! It is always preferable to model a 3D object in such a way that its transparent faces are rendered with their own material. Otherwise all opaque faces also need to be drawn with expensive alpha blending.
Useful Configuration Parameters
Here is a list of frequently needed configuration parameters:
Specify further resource packages for the scene viewer:
<InputPackage fileName="../packages/materials.murlres"/>
Specify an image location for textures:
<ImageLocation pathName="./myPath"/>
Replace textures:
<!-- TGA file format is not supported; use the converted PNG file instead -->
<Texture findFileNameMatchingPattern="myTextureImage.tga" replaceWithFileName="myTextureImage.png"/>
Replace and resize textures (In addition to sizeX and sizeY also the following parameters can be used: flipX, flipY, rotation with IEnums::Orientation values):
<Texture findFileNameMatchingPattern="color.jpg" replaceWithFileName="grey.jpg" sizeX="1024" sizeY="1024"/>
Replace material:
<Material findIdMatchingPattern="Matte__FF000000_" replaceWithGraphNodeId="/MaterialMainMatte"/>
Replace material with material slot:
<Material findIdMatchingPattern="green" replaceWithSlot="8"/>
oder
<Material findIdMatchingPattern="*"
          replaceWithMaterialSlot="3" replaceWithTextureSlot="0" replaceWithParametersSlot="5">
    <Texture createWithSlot="0"/>
</Material>
Change material blend mode:
<Material findIdMatchingPattern="*" blendMode="NONE"/>
Change material, color values and add texture:
<!-- Change color values for material -->
<Material findIdMatchingPattern="*" replaceWithGraphNodeId="/MaterialMain" ambientColor="1f,1f,1f,1f" diffuseColor="1f,1f,1f,1f" specularColor="1f,1f,1f,1f" shininess="50">
    <!-- Scene does not define a texture; manually add texture -->
    <Texture createWithFileName="raf22031.jpg" flipY="yes"/>
</Material>
Generate mesh colliders:
<GraphInstance graphId="GraphInstance" filePrefix="graph_instance"
               generateMeshes="yes" generateColliders="yes"/>