XML Content Assist
Posted on August 7, 2015
Creating Murl Engine scene graph XML files can be a long-winded task, especially for beginners who are new to the syntax. To facilitate the creation of XML files, we now provide a complete XML Schema that contains the description of all possible XML tags and attributes. In combination with a proper IDE you gain all the "Intellisense" code/content assist goodies like automatic code completion, context sensitive selection lists, hints, code validation and error highlighting.
XSD File
An XML Schema (also XSD, short for XML Schema Definition) describes the structure of an XML document and can be used to express a set of rules to which an XML document must conform in order to be valid. XSD is a W3C recommendation and is widely supported by IDEs and XML editors. A good starting tutorial can be found here: www.w3schools.com/schema/
We now provide one XSD file (murl_graph_nodes.xsd), which describes the structure of all Murl Engine XML resource and configuration files:
- XML Animation Resource
- XML Atlas Resource
- XML Dictionary Resource
- XML Graph Resource
- XML Image Resource
- XML Package Resource
- XML Config File - Atlas Generator
- XML Config File - Scene Converter
The XSD file will be provided as part of the Murl Engine with all future releases. The file will then be located in the directory murl/common/xsd/.
In the meantime you can also download the file from here.
All entities in the XSD are defined in the namespace: https://murlengine.com
Advantages
If your IDE provides an XML editor with XSD support you greatly benefit from automatic code completion and live validation. Let’s illustrate the advantages with a short example using Visual Studio.
We create an XML animation resource file and start a new tag with the < character.
The editor automatically displays a list with all possible tags that are allowed in an XML animation resource file.
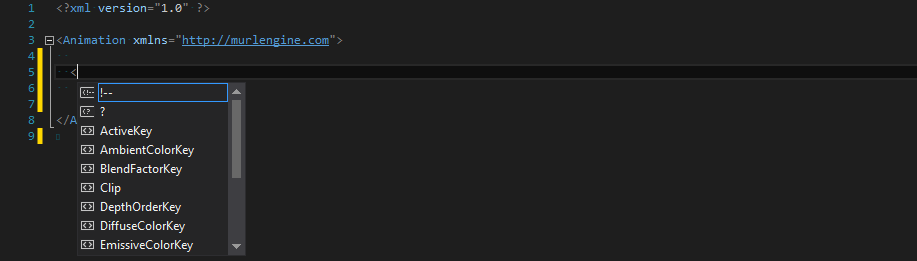 Context sensitive tag list
If we select one element in the list, we get additional information about that tag displayed to the right.
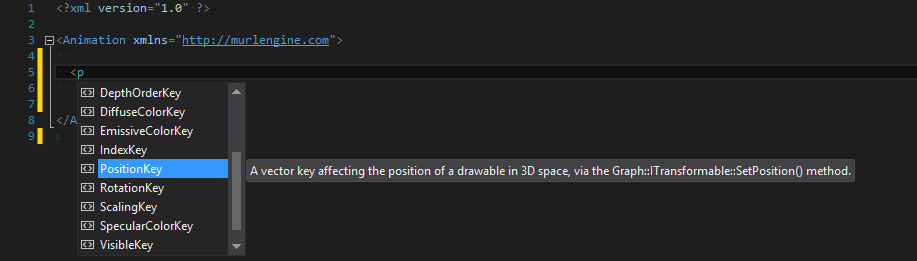 Info overlay
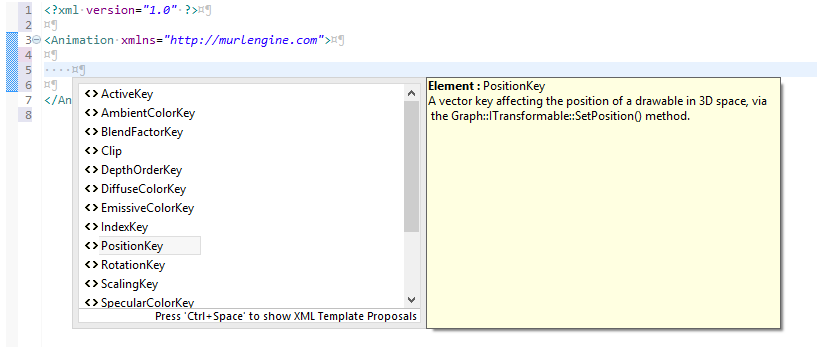
We select the desired tag and immediately get a list with all possible attributes for this tag; again with hints in an extra overlay window to the right.
The wavy line under the PositionKey tag reminds us that we haven't specified all mandatory attributes yet.
 Attribute list with info overlay
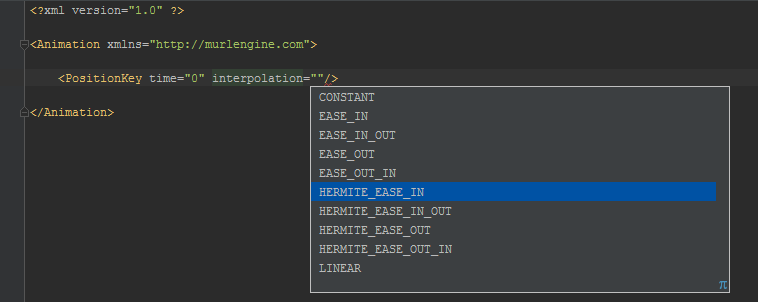
We select the desired attribute. If the possible attribute values are composed of a fixed set of values, like an enumeration, the desired value can again conveniently be selected from a list.
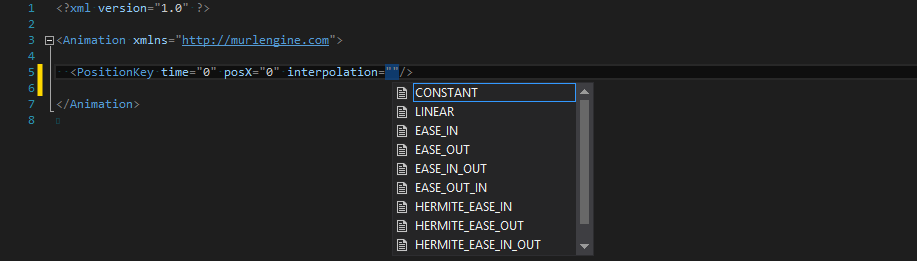 Value selection list for enumeration values
For other values we get a brief syntax check.
For example, in the screenshot below we set the angle to 90 degrees but forgot to specify the deg/d suffix.
Visual Studio is reminding us that the value is not valid according to the XSD and therefore draws a wavy line below that value.
 Value syntax check
When we add the suffix d, we get a document that passes the XSD validation and the wavy line disappears.
 XSD validation passed
Installation
Typically two steps are necessary to benefit from XSD content assistance:
- Tell the editor where your XSD file is stored.
- Link the correct XSD file with your XML file.
Step two is generally done by specifying the correct namespace in the root tag using the attribute xmlns.
		<Graph xmlns="https://murlengine.com"/>
		...
		</Graph>
Step one depends on your editor:
Visual Studio
The simplest way in Visual Studio is to add the XSD file to your solution and exclude it from build (Properties > Exclude from Build).
 Visual Studio Solution Explorer
Now you have full XML content assist functionality in Visual Studio.
Note: Future versions of the Dashboard will automatically add a reference to the XSD file when a new project is created.
Eclipse
Eclipse also provides a powerful XML Editor with XSD support. If it is not included in your installation, you can add it easily:
- Go to Help > Install New Software...
- Work with: Indigo repository - https://download.eclipse.org/releases/indigo/
- Select: Web, XML, Java EE and OSGi Enterprise Development > Eclipse XML Editors and Tools
To add the XSD file to Eclipse follow these steps:
- Go to Window > Preferences > XML > XML Catalog, and click Add.
- Under Location, enter the path of your XSD file
- Verify that the namespace name is set to "https://murlengine.com" and press OK
Now you should have full XML content assist functionality in Eclipse.
 Eclipse XML Editor
Note: Press CTRL-SPACE if the overlay does not show up automatically.
IntelliJ IDEA
Intellij IDEA also provides an XML Editor with XSD support. To add the XSD file follow these steps:
- Go to File > Settings > Languages & Frameworks > Schemas and DTDs
- Add new schema to "External Schemas and DTDs" by clicking the
+button - Enter "https://murlengine.com" into the URI field
- Select the XSD file in the explorer tab and click OK
Now the XML content assist functionality should also be available in Intellij IDEA.
 Intellij IDEA XML Editor
For other IDEs and XML editors the method is similar.
Note: Xcode has only poor editing support for XML files and does not support XSD validation. You may have to use Eclipse or another XML editor to get XSD based content assist functionality on a Mac.
Don't miss out on any update,
subscribe to our newsletter.